There are a wealth of programs available for Linux that do pretty much everything imaginable. In this article, I’m going to take a look at some common applications as well as some that are perhaps not so well known. I’ll provide a brief description of the application as well as basic usage instructions.
Just as in the last article, I will be using Ubuntu for the instructions below. Since each distribution has its own package management system, it would be impossible to cover all of them here.
Finding and Installing the Applications
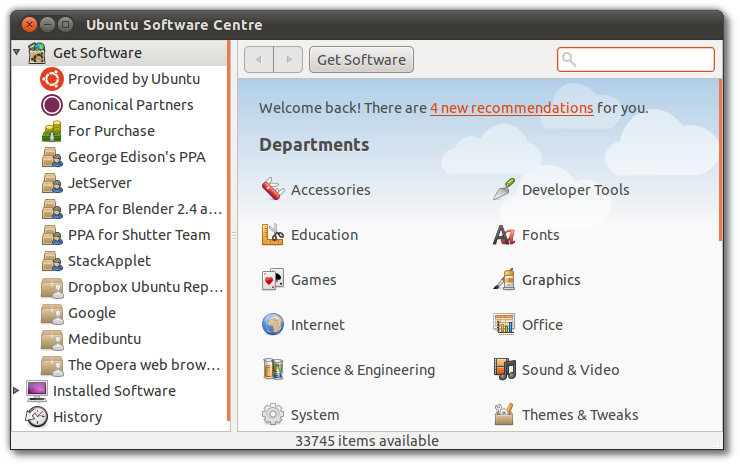
In order to use the applications, we must first install them. In Ubuntu, we will use the Software Center for that. Depending on your version of Ubuntu, you can open the Software Center by either going to Applications->Software Center or pressing the super key and typing “software center.”

Once you have the Software Center open, you can begin browsing the categories that are listed there for applications that you might like to try. If you know the name of the application you are looking for, you can simply type it into the search box in the upper-right corner.

LibreOffice – A Full-featured Office Suite
One of the most important considerations when migrating to another operating system is compatibility with the file formats that your current files are in. You will certainly be relieved to hear that LibreOffice offers nearly full compatibility with common office document formats like Microsoft Office’s new XML formats as well as older and less widely used formats.
LibreOffice features a full suite of tools including a word processor, spreadsheet editor, presentation tool, and a couple of other tools for creating databases and mathematical formulas. The entire suite has a very consistent look and feel and the components integrate together quite well.
We’ll take a quick look at one of LibreOffice’s main components: LibreOffice Writer.
When you first start LibreOffice, you will be greeted with a nice welcome screen that offers you a number of different choices. We will begin by creating a text document, so begin by clicking on that. The toolbar on the top row contains commands for opening documents, saving the current document, printing, etc. This is called the standard toolbar. Directly underneath it is the formatting toolbar which provides you with tools for modifying the style of the text in the document. You can change font style, font size, color, etc. using the controls in this toolbar.

Depending on your Linux distribution and configuration, you will find the menu at the top of the window or in the top desktop panel. You will find more options here that allow for inserting pictures, lines, special characters, and pretty much anything else you can think of to insert into a document. You can change some of the default settings for LibreOffice Writer by going to Tools->Options in the menu. If you don’t like the way the menu or the toolbars are arranged, you can customize them by going to Tools->Customize.
The GIMP – An Extremely Powerful Image Editor
When editing photographs with open source software, it’s difficult to beat the GIMP (Gnu Image Manipulation Program) when it comes to flexibility and capability. The GIMP offers a plethora of filters and color adjustment tools that can fix a number of common problems with photographs. The GIMP is also an excellent tool to use for creating logos, text banners, and even simple animated GIFs. Nearly every common image format is supported both for loading and saving images.
Since the interface can be a little overwhelming to a beginner, we’ll take a quick peek at how to perform some basic operations in the GIMP. One of the first things we’ll look at is the interface. When you first start the GIMP, you will be presented with three windows. The one on the left contains the editing tools you will use as well as the options for the currently selected tool. We’ll call this the tool window. The window in the center is the actual editing window. The editing window also contains the application’s menu (unless you are using Ubuntu 11.04 – in which case the menu will be in the top panel). The window on the right contains more settings and tools for working with the image. You can actually customize which tabs are displayed in this window – in fact, you can even create additional windows (or “docks”) with new tabs.
We will create a simple logo with the Gimp using some of these tools:
- Start by creating a new image by going to File->New. For this example, we’ll specify dimensions of 640 x 480 – all of the other settings in the window can be left at their defaults. You will now be presented with a nice white canvas which we will use to create our logo.
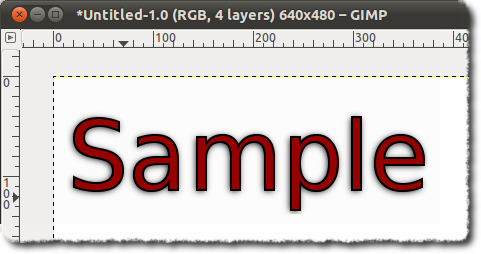
- Now click the Text Tool in the tool window (the icon is an uppercase ‘T’). After clicking in the upper left corner of our image, we can begin typing the text for our logo. Notice that the lower half of the tool window now contains options for the text tool. We can change the color of the text, the font, the font size, etc. for the text by changing these settings. For our example, we’ll choose a font size that causes the text to fill the width of the image. We’ll also pick a fancy font and change the text color to a slightly darker red.
- On the very bottom of the text tool options is a button with the caption “Path from Text.” We’ll use this button to create a path that follows the outline of the letters in the text. Note that nothing will appear to happen after clicking the button but rest assured that a path was indeed created. In the next step we’re going to do something with that path.
- Now go to Edit->Stroke Path and change the line width to 2 or 3. After clicking “Stroke,” a thick line will now outline the letters of the words. For the last step, we’ll add a nice shadow to the text.
- We need to create a new layer for the shadow, but I want to draw your attention to something important before we do that. If you look at the layers tab in the window on the right, you’ll notice that we actually already have two layers – the white background and the text layer. Our shadow will be inserted between these two layers. We’ll do that by right-clicking underneath the Background layer and clicking “New Layer.” Now drag the new layer between the other two (if it isn’t already) and click on it to set it as the current layer.
- Now repeat step 2 to insert the same text in the shadow layer. Leaving everything else the way it is, set the color of the text to black and drag the text around on the image so that it lines up the text on the other layer. You should now have two layers of identical text: the top layer with red letters outlined in black, and a layer underneath with black letters.
- The last step is to blur the shadow layer so that it will be visible under the top layer. We do that by going to Filters->Blur->Gaussian Blur. Set the horizontal and vertical blur radius to 10 and click “OK.” If everything went well, you should now be able to see the shadow underneath the top layer.

Once your image is complete, you will probably want to save it. It’s always a good idea to save layered images in the GIMP’s native XCF image format. Although this format is used only by the GIMP, saving an image with this format is the only way to preserve all of the layers and their settings for later editing. Common formats like JPEG and PNG have no way of storing this information. Of course, once your image is complete you can save the image in another more common format.
Banshee – A Simple Music Manager
When it comes to playing music, there is no better application than VLC Media Player. However, VLC lacks a powerful media manager – something that Banshee provides. When you first start the application, you will be presented with an empty library. To add music to the library, simply go to Media->Import Media and then select a folder that contains music. On a default installation of Ubuntu, you will be missing a lot of codecs that you would need to play back common audio formats. These codecs are not included by default due to patent and distribution restrictions. You can find detailed information and installation instructions for those codecs here.
Assuming you have all of the proper codecs, navigating through your music library and playing songs is very simple. With the default layout, your list of artists will be to the left of the album list with the individual songs from those albums underneath it. You can easily add items to the play queue by simply dragging them to the “Play Queue” entry on the far left. You can also create a custom playlist by going to Media->New Playlist and then dragging songs to the new playlist in the far left menu.
Shotwell – A Comprehensive Photo Manager
There are always new opportunities to take photographs, and with the ever-decreasing cost of high-end cameras and storage equipment, managing those photographs in an orderly and easily-accessible way can seem impossible. Fortunately Shotwell has you covered. Importing your photos and sorting them is a breeze. In fact, when you first launch Shotwell, you will be asked if you want it to automatically import all of the pictures in your Pictures directory (the one in your home folder). You can add other folders afterward by going to File->Import from Folder. If you have a large number of photos, the import process may take a considerable amount of time – so you might want to read a book or something while you wait. When importing from a different directory, you will be asked whether you want to copy the pictures to your Pictures directory or import them in place.
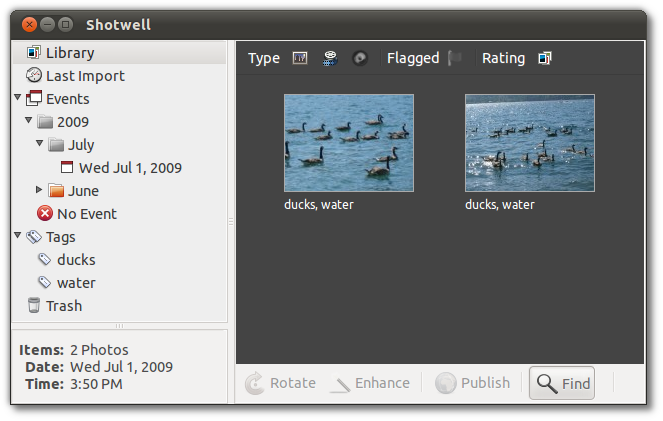
Once the import process has completed successfully, folders will be added to the left panel with the dates from the pictures. The pictures are grouped by year, followed by month, and then day. You can click on any entry to view the pictures that full under the selected date range.

Probably the most powerful feature of all is the tagging system that Shotwell provides. Each photo can have tags associated with it which can later be used to find it. You can add tags to a picture by right-clicking it and clicking Add Tags. For example, suppose I take a lot of pictures of ducks in outdoor settings. Each picture would have the tag ‘duck’ and would also have a few tags describing the surroundings. Then whenever I wanted to find all of the pictures that had a duck and a rock in it, I would click the Find button (at the very bottom of the window) and type in ‘duck rock’ and presto! – all of the pictures with the tags ‘duck’ and ‘rock’ would appear.
Thunderbird – An Efficient Email Client
Firefox is probably the first thing that comes to mind when the word “Mozilla” is mentioned. Although it is true that Firefox is Mozilla’s flagship project, Thunderbird is an incredibly awesome application as well and holds its own against other email clients. Just like Firefox, Thunderbird offers the user the ability to install themes and extensions that add features to the application. We’ll take a quick look at getting Thunderbird set up with a Gmail account.

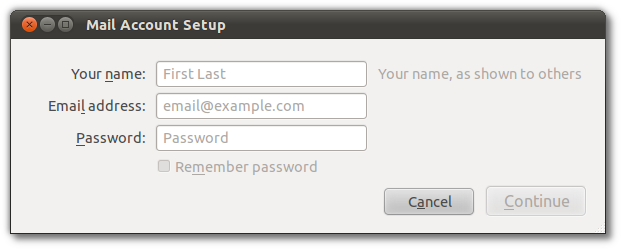
When you first start Thunderbird up, you will be presented with the “Mail Account Setup” dialog. This really couldn’t be simpler when it comes to Gmail. Just enter the information requested in the three boxes and click “Continue.” If all goes well, Thunderbird will be able to properly detect the right settings and you can click the “Create Account” button. Thunderbird will then download the message headers for the emails in your inbox.
Filed under Operating Systems Software Ubuntu
Tagged: applications, installation, software, ubuntu

But… those are not unique to Linux. This is kind of like saying, “Check it out, Linux has a file system!”
I’m sure there will be hundreds of people who poke there heads in to say “What about X”. Decent run down of Applications not installed by default! The biggest problem I have when people move to Ubuntu is they can’t seem to grasp the concept of a Software Center
@Marco I agree. Ubuntu and its applications need better first-time help to explain how it works and how it’s different from alternatives.
@Frage Anonym – And yet, in George’s previous article on migrating to Linux, the second comment specifically asks for using Photoshop, Outlook, and DVD playback on Linux.